How to add accessories to a kayak
It's very easy to glue small things to a kayak, such as a layer of foam to pad the seat. See Kayak Seat.
Hardware such as hatches, towing points and rudders are often bonded to the deck of a kayak by the manufacturer using methacrylate adhesive. All these accessories can be bought separately and fitted by the owner. The easiest way to fit hardware usually to drill holes in the deck and attach the accessory with screws, bolts or pop rivets. To find parts and materials, see Retail Outlets.
Bolts, screws, rivets
The usual solutions are stainless steel for bolts, nuts and screws and aluminum for rivets. Avoid brass. See Metals & Salt Water.
Fiberglassing
It is a good idea, before attaching an accessory to the outside of the deck of a kayak, to place a rigid or semi-rigid backing plate inside the kayak, so that when you drill holes through the deck they also go through the backing plate. This will reinforce the deck, spread the load of whatever you are attaching, and prevent the deck from cracking under the pressure of the bolt or rivet.
High-quality accessories intended for sailboats are often sold with a backing plate.
On a fiberglass kayak the best way to make a backing plate is by adding a fiberglass pad inside the deck. You are simply increasing the thickness of the deck at that point.
 |
You can get the materials in small quantities from an auto accessories store. Put the kayak in a warm, dry place. 20 degrees centigrade is ideal, and at that temperature most polyester resins will start to set in 10-25 minutes. If you want to work outdoors, in a cool climate it is best to wait for summer. In warm weather, work fast and avoid direct sun in case the resin sets before you're finished. Use fresh water to wash salt off the parts of the deck where the accessory is to go, and let it dry. Use mild abrasive paper (say 400 grit) to clean and roughen the inside of the hull. |
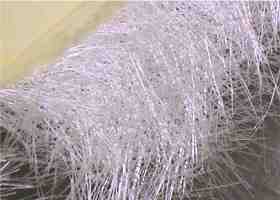 |
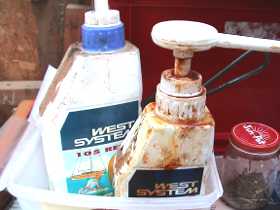
Use an old pair of scissors to cut some medium-weight CSM (chopped strand mat) glassfiber reinforcement to the correct size, and then cut out a second layer of CSM the same size or a little larger. Roll the kayak over so that gravity will help keep your resin and cloth where you want it. Find a small disposable container such as a glass jam-jar, or half a polythene or waxed cardboard milk carton. Don't use a polystyrene yogurt pot if you are using polyester resin, because the container will swiftly dissolve. Also, prepare some small wooden sticks for stirring. Mix a small amount of polyester or epoxy resin with the correct amount of the manufacturer's hardener / catalyst, and stir well. |
 |
In the case of polyester resin, which has a short pot life, "small amount" means as much as you can use up in five minutes, probably 25 mL to 50 mL for a small job. Paint a little of the resin onto the roughened area to make it slightly sticky, place the first layer of CSM and use your brush to wet it thoroughly with resin. Brush with a vertical stippling motion, not as if painting because that will drag the CSM fibers out of place. CSM is a coarse white felt. Put on less resin than you think you will need and use the brush vigorously for one minute. If that is enough to turn all the CSM from white to dark, don't add any more. Then place the next layer of CSM and wet that. Squeeze out all the bubbles. |
If the edges of your CSM spring up, keep stippling because it will get limp when the resin has dissolved the binder. If the edges still spring up, use sticky tape and anything else handy (matchsticks, rolled-up cardboard, bits of polythene sheet) to hold it in place, at least until the resin goes rubbery. Leave the kayak in a warm dry place for 24 hours.
Both polyester and epoxy resin produce disagreeable and hazardous fumes, so please read the manufacturer's product data sheet, work in a well-ventilated space and don't spend too long with your head inside a hot and fume-filled kayak. Both sorts of resin are bad for your skin and epoxy in particular can cause catastrophic dermatitis, so wear rubber or synthetic rubber gloves. To eliminate all risk of dermatitis, also use barrier cream and hand cleanser intended specifically for use with polyester resin. If you intend to use abrasives or a saw on an FRP laminate, even outdoors, wear a good respirator mask - which means a rubber face mask with twin replaceable filters.
Nitrile gloves are best as polyester resin does not attack them chemically. If you can't readily obtain nitrile, a pair of medium-weight latex household gloves (just your ordinary Rite Aid or Vileda) should last for long enough to add an accessory.
Polyester resin dissolves polystyrene, so don't let it drip onto polystyrene foam buoyancy. It creates quite a lot of heat as it sets. To keep it liquid for as long as possible, let it spread over the bottom of a broad mixing pot rather than letting it pool in a deep one. Don't leave a deep pool of curing resin where it could start a fire.
You can buy liquid brush cleaner for polyester and epoxies, but this is expensive, nasty and bad for the environment. It is often carcinogenic and should never be used to get smears of resin off your skin. When doing one small job it may be better to use cheap brushes and throw them away afterwards. With polyester resin, a brush will last you for batch after batch of resin as long as you use it continuously and keep wiping the remains of the last batch off with some old newspaper. At the end of your work session you can get a brush quite clean by working the bristles in hot water with some detergent, before the resin hardens.
For more on fiberglassing, see Fiber-Reinforced Plastic (FRP) and Deck Rigging .
Sealing
Before bolting or riveting an accessory into place, coat the deck and the underside of the accessory with a thin layer of polyurethane marine sealant such as Sikaflex. If that is not available, you can achieve quite good results with the sort of transparent silicone sealant used by building contractors when fitting windows.
Go to next page for:
• Paddles For Sea Kayaking